Friday, 7 June 2013

Happy days!

I just realised it's been six months since I updated this blog... wow!

Anyway, when I was in Japan last year I was looking for the reissued "Thunderbirds" kits by Aoshima all I managed to get were FAB1 and the MOLE.  I saw a Fireflash, but when I went back to get it... gone u_u
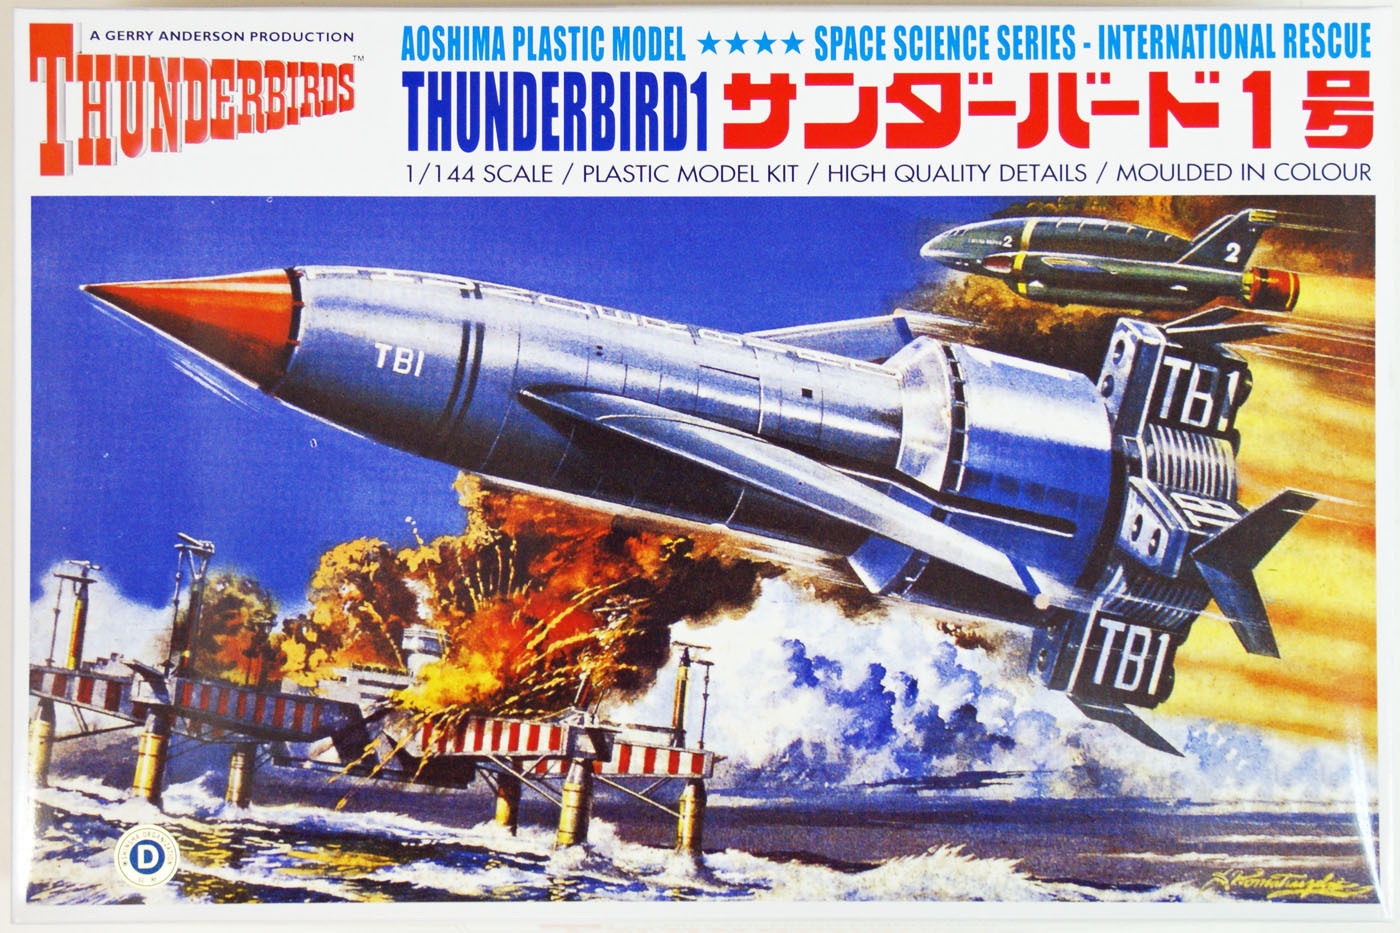
However I have at last managed to get their 1/144 scale Thunderbird 1, which is on its way from Japan to me even as I write.


Although Aoshima are using old Imai artwork, the kit is newly tooled and as accurate as any modeller could hope for.  It's around the same size as the Comet one I have, but less work!

On the new kit front Aoshima are giving us a newly tooled Thunderbird 3 to 1/350 scale, and it looks very nice.. this is the kit from Aoshima's site:

As you can see it's a beautiful model which is around the same size as my JR21 version - which I will replace with this piece of plastic goodness.

Finally it was announced a few months ago that ITV in the UK have commissioned a brand new "Thunderbirds" TV series to air on their CITV channel.  It will be a combination of CGI characters and real sets - how this will work is anyone's guess... but it can't be worse than the recent feature film version.

Wednesday, 26 December 2012

Tragic News

I have only recently heard (within the last half hour) that Gerry Anderson has died... he passed away this afternoon according to the BBC, at the age of 83.

Gerry's series were such a big part of my childhood, and made me want to make models.  As a child I had the Angel Interceptor from Airfix, as well as the Dinky toys from Thunderbirds, Captain Scarlet, Joe 90 and UFO.  His series introduced me to science fiction (as well as Dr Who and Star Trek).

Rediscovering the Supermarionation series thanks to video in the '80s rekindled my love for Gerry's creations, so much so that I have never lost interest in them since then.  Indeed I am now a bigger fan of his work than at any point in my nearly 49 years on this planet.


Thank you for adding such a HUGE part of the soundtrack to my childhood... many millions of fans the world over will be feeling upset today, but we should rejoice in the fact that you leave us with a legacy that will never age, will never lose its magic.

Rest in Peace, Gerry.

Wednesday, 12 December 2012

JR21 Thunderbird 3 conversion update

After ordering some prezzies after work I decided to try and fill the gaping hole in the side of the JR21 Thunderbird 3's lower hull.  Using copious amounts of Plastic Weld followed by superglue I was able to insert plastic card into the cavity, blocking it off.  I then added a couple more layers to bring the level up closer to the surface ready for my first layer of Revell Plasto filler.

Apologies for the photo - taken with my mobile late at night.


I am now much more confident that this is going to work, and I can have a decent-size model of TB3 without forking out for an expensive resin kit.  Old broken toys can have their uses too.

Tuesday, 11 December 2012

Very brief update

I was unable to sleep last night so I got my razor saw out and started trimming the area around the hole left by the motor on the JR21 Thunderbird 3.  The ABS was easy to deal with and just needs some sanding to leave a flush surface.  Now I just have to figure out how to cover the hole.
Originally I was going to remove the engines from the lower cylinder and replace it, but that's too risky.  Instead I need to find a plastic cylinder of the same size and then cut out a shape roughly the same shape as the hole.  Once that is secure I can fill and sand until the fit is seamless and I have a complete unit.

I was wrong about the docking ring and arms being softer plastic... they also appear to be ABS, albeit rather slippery ABS.  That's good as it means I can sand off rough areas, and also tidy up where I cut the nose wheel from the docking ring.
I will also have to use filler on the tip of the nose and sand to shape... or a blob of superglue, which may be stronger and less likely to 'plink' off as I sand it to a point.

All in all I am very happy with this old toy.  Comparing it to profile photos I can see that the main body could be a little longer, while the lower cylindrical bulge could be a little shorter, but I'm not complaining, it was a toy, after all.

From what I've seen of the other JR21 toys, I think they are all pretty good likenesses, so much so that they were used in the Thunderbirds Christmas episode "Give or Take a Million" albeit with some minor changes such as TB1 with legs and with its wheels removed.

(photo copyright ITC Entertainment)

That photo actually makes TB3 look a bit dumpy for some reason... could be the second version which was slightly different from mine.

Monday, 10 December 2012

The State of Play

I thought I would show where my models are in their progress so far, in particular the Mole, Thunderbird 1 and Thunderbird 4.

Here is the Comet Thunderbird 1.
As you can see the shape is perfect, this is undeniably TB1... but also notice the amount of filler needed.


The nose is just taped on while the main rocket engine block is just push-fitted... despite the excess filling this is just a beautiful model in the making.

Here is the Bandai TB4... the impeller 'blocks' are glued on as is the tail, but the hull halves are just taped together, while the canopy is just push fitted into place... notice it's clear rather than the usual tinted plastic used by Imai for their Anderson kits.
The nose needs reshaped, and the detail replaced... this is a hangover from its previous incarnation.
The shape is nice... not as accurate as Comet's TB1, but there are nearly 25 years between the two.


In the photo below notice the lack of wheels, and even wheel holes!


Finally for the model kits, the Mole.
This is one of the nicest Anderson models I have ever seen... it's big, it's mostly accurate and just oozes quality.  The actual Mole unit is just taped together while the tractor unit just needs some minor detailing before I can paint it.
The tracks, while a pain to assemble, actually look really very good... if only they had thought of this in the '60s we could have had a decent Mole long ago.


In addition to the kits, here is the old 1960s JR21/Rosenthal Thunderbird 3.  It's moulded in ABS plastic with a few parts in a softer material.
Shape-wise this is spot on, but the gaping hole will be a challenge to repair... but thanks to Plastic Weld I can mix different plastics and hopefully end up with a good looking model at the end of it.


More updates later ^__^

Sunday, 9 December 2012

More models

Over recent days I've managed to get models such as the Bandai version of Thunderbird 4 and a broken JR21/Rosenthal Thunderbird 3.

The 1992 Bandai TB4 is a retooled Imai kit from 1966, and is now basically a static model.  Gone is the clockwork motor and the wheels, and farewell firing missiles.  What we have now is a smooth lower hull, and a nose which looks rather strange.
I will be going into more detail on this kit when I do blog about building it.

(Photo from eBay)

However, a brief review won't do any harm.
Shape-wise it isn't 100% accurate: the nose has a weird angle change 2/3 of the way along, the windscreen should be more curved, the sides are too vertical and the rear of the hull should bulge more.  However, once built and with some slight reworking it DOES look like Thunderbird 4, and that's what really matters.  There were several models used in the series, each with detail and shape differences, so as far as I am concerned this is a nice model... although I will have to scratchbuild a cabin interior and rework the nose as it's really quite wrong.

The other item is the broken JR21 Thunderbird 3 toy...


(Photos from eBay)

In mint condition these are worth hundreds of pounds, I won this for £5 plus postage.  It is a shade over 8" long and is moulded in styrene, so can be rebuilt as a static model.
As you can see the rear mounted friction drive motor has long gone, as has the front wheel, not that I'm bothered about them.  This is an accurate shape and was even used in the TV episode "Give or Take a Million" as one of the T'Bird toys given to the little boy who won the prize of visiting Tracy Island.
Scale wise that would make it a shade smaller than 1/350 scale, so can match the Imai accurate TB2 and the F-Toys TB1.
There was a second version of this toy, but it suffered from a shorter body for some reason.

My intention is to tidy up and repair the rear section so that it is a complete unit, remove the front wheel mount and then repaint the craft as a model.  This will be a challenge, but I will end up with a nice model at the end of the process.  Compared to the smaller Imai and Bandai models, this is a much more impressive base model.

Finally, I was able to get the Comet Miniatures Thunderbird 1 kit.


Unlike the Japanese model kits this one comes in the form of simple injection-moulded parts and vac-formed forward fuselage and wings, and white metal landing legs.
The plastic used for the bulk of the parts is quite brittle and, on my one anyway, covered in release grease and dirt.  The vacuum formed parts are accurate in shape, but detail where present is soft.  My one also has one half 2mm longer than the other... which wasn't too good.  It reminded me of Comet's old Fireball XL5 kit (shudders).  The metal legs on mine are also bent, so quite useless.

As with any limited run kit like this it needs a lot of work to get the best out of it... I've built a few kits like this in the past, so it doesn't really put me off.  I think unless you are used to ill-fitting parts and some scratchbuilding keep away from this old kit... and go for the Aoshima one, which is practically the same size.
Talking of size... this model is NOT 11" long... just under 9 inches is more like it.  Using the most common length of 115 feet that makes this around 1/150 scale... half the 1/72 scale listed on the front.
I've seen one or two of these beautifully finished so I am confident that something great can come from it.

Thursday, 8 November 2012

Better late then never!

Well, it's about time for an update.

After my shoulder got better it was time for me to prepare for my holiday... and work had become manic over the past few weeks!  Anyway, all that's behind me now... and I am now on holiday in Japan... yay!
The land of short skirts, 20 degrees centigrade in November and AKB48 all over the place... however, it's also the home of the best plastic kits in the world.

I have been here for 5 days and have so far managed to buy the Aoshima reissues of the final Imai FAB1 and Mole.

FAB1 is the updated Imai produced before they went bust.  They had produced such accessory sets as turned metal wheels and resin figures of Lady Penelope and Parker.  Sadly the Aoshima version does not include the resin figures, but it DOES have etched metal dials and number plates.
It's also nice to finally have a large (1/32 scale) FAB1 with an accurate shape and a clear canopy... the older one was really an unbuilt toy with a clear blue canopy.  The retool not only corrects the shape, but also includes a full set of headlights and tail lights, with optional machine guns and harpoons.


One oddity with this kit is the box, which clearly states that this is a 1/350 scale kit.  That's some mistake!
I was expecting to see Imai's old artwork, which was always exciting and beautifully done.  This one tries to look retro and ends up looking a bit weak.

The Mole  is again a late Imai model and is a 10" long model in a nominal 1/72 scale, which is VERY handy for dioramas where HO buildings and cars can be used... time to hit the model railway shops methinks haha.


The model is intended for motorisation and includes all the wiring and battery connections... I find things like this make the model weak and compromises detail for accessibility.  I will simply add a flashing red LED to the top of the Mole, with the battery being accessed through the rear plate.

This is a pretty accurate model by anyone's standards and includes such gems as individual plates for the tracks... you glue each plate to a rubber track.  As mine will be a static model I will fix the track in place then  add the plates after spraying them a basic steel colour.  After that they can be weathered along with the rest of the model... and boy will it be weathered!
The tractor unit faithfully captures the shape and detail of  the original toy tractor used in the series as well as the Airfix Girder Bridge used as a support cradle and the Atlas rockets used as detail parts.  Wonderful stuff.
If only Imai had seen fit to do the same with their horrible Firefly and Recovery Vehicle models we could have had some really nice large pod vehicles as plastic kits at decent prices.

Talking of prices, these aren't cheap. FAB1 was ¥2100 and the Mole was ¥3185, both of them coming from Yodabashi Camera, a giant electronics shop. I got the Mole in the Ueno branch (near the station) and FAB1 in the Akihabara megastore.
The last of the kits I'm after is the 1/144 scale Thunderbird 1, which I think is an Aoshima original, but I could be wrong.